- Joined
- Jan 11, 2026
- Messages
- 149
There was a lot of great tech info available on SavageShooters forum, one was how to install an Accutrigger in lieu of the 3-screw. I happened to save that writeup and provide the steps below. Credit for this upgrade goes to SS member Newtosavage who published this 1.9.25...
I will try to scan and post the pictures provided in the original write up, that depends how well the printed pictures re-scan.
My new old stock model 16 arrived a few days ago and one of the first things I wanted to change was the trigger. I know those original three-screw triggers can be adjusted and made to work well, but all my other guns have the Accutriggers on them and I actually like the Accutrigger. So with a little encouragement from J. Baker, I managed to figure out what needed to be done to install a present day Accutrigger into this old gun. Good news is that it didn't take that long and I only needed a few common tools. Here's what I did:
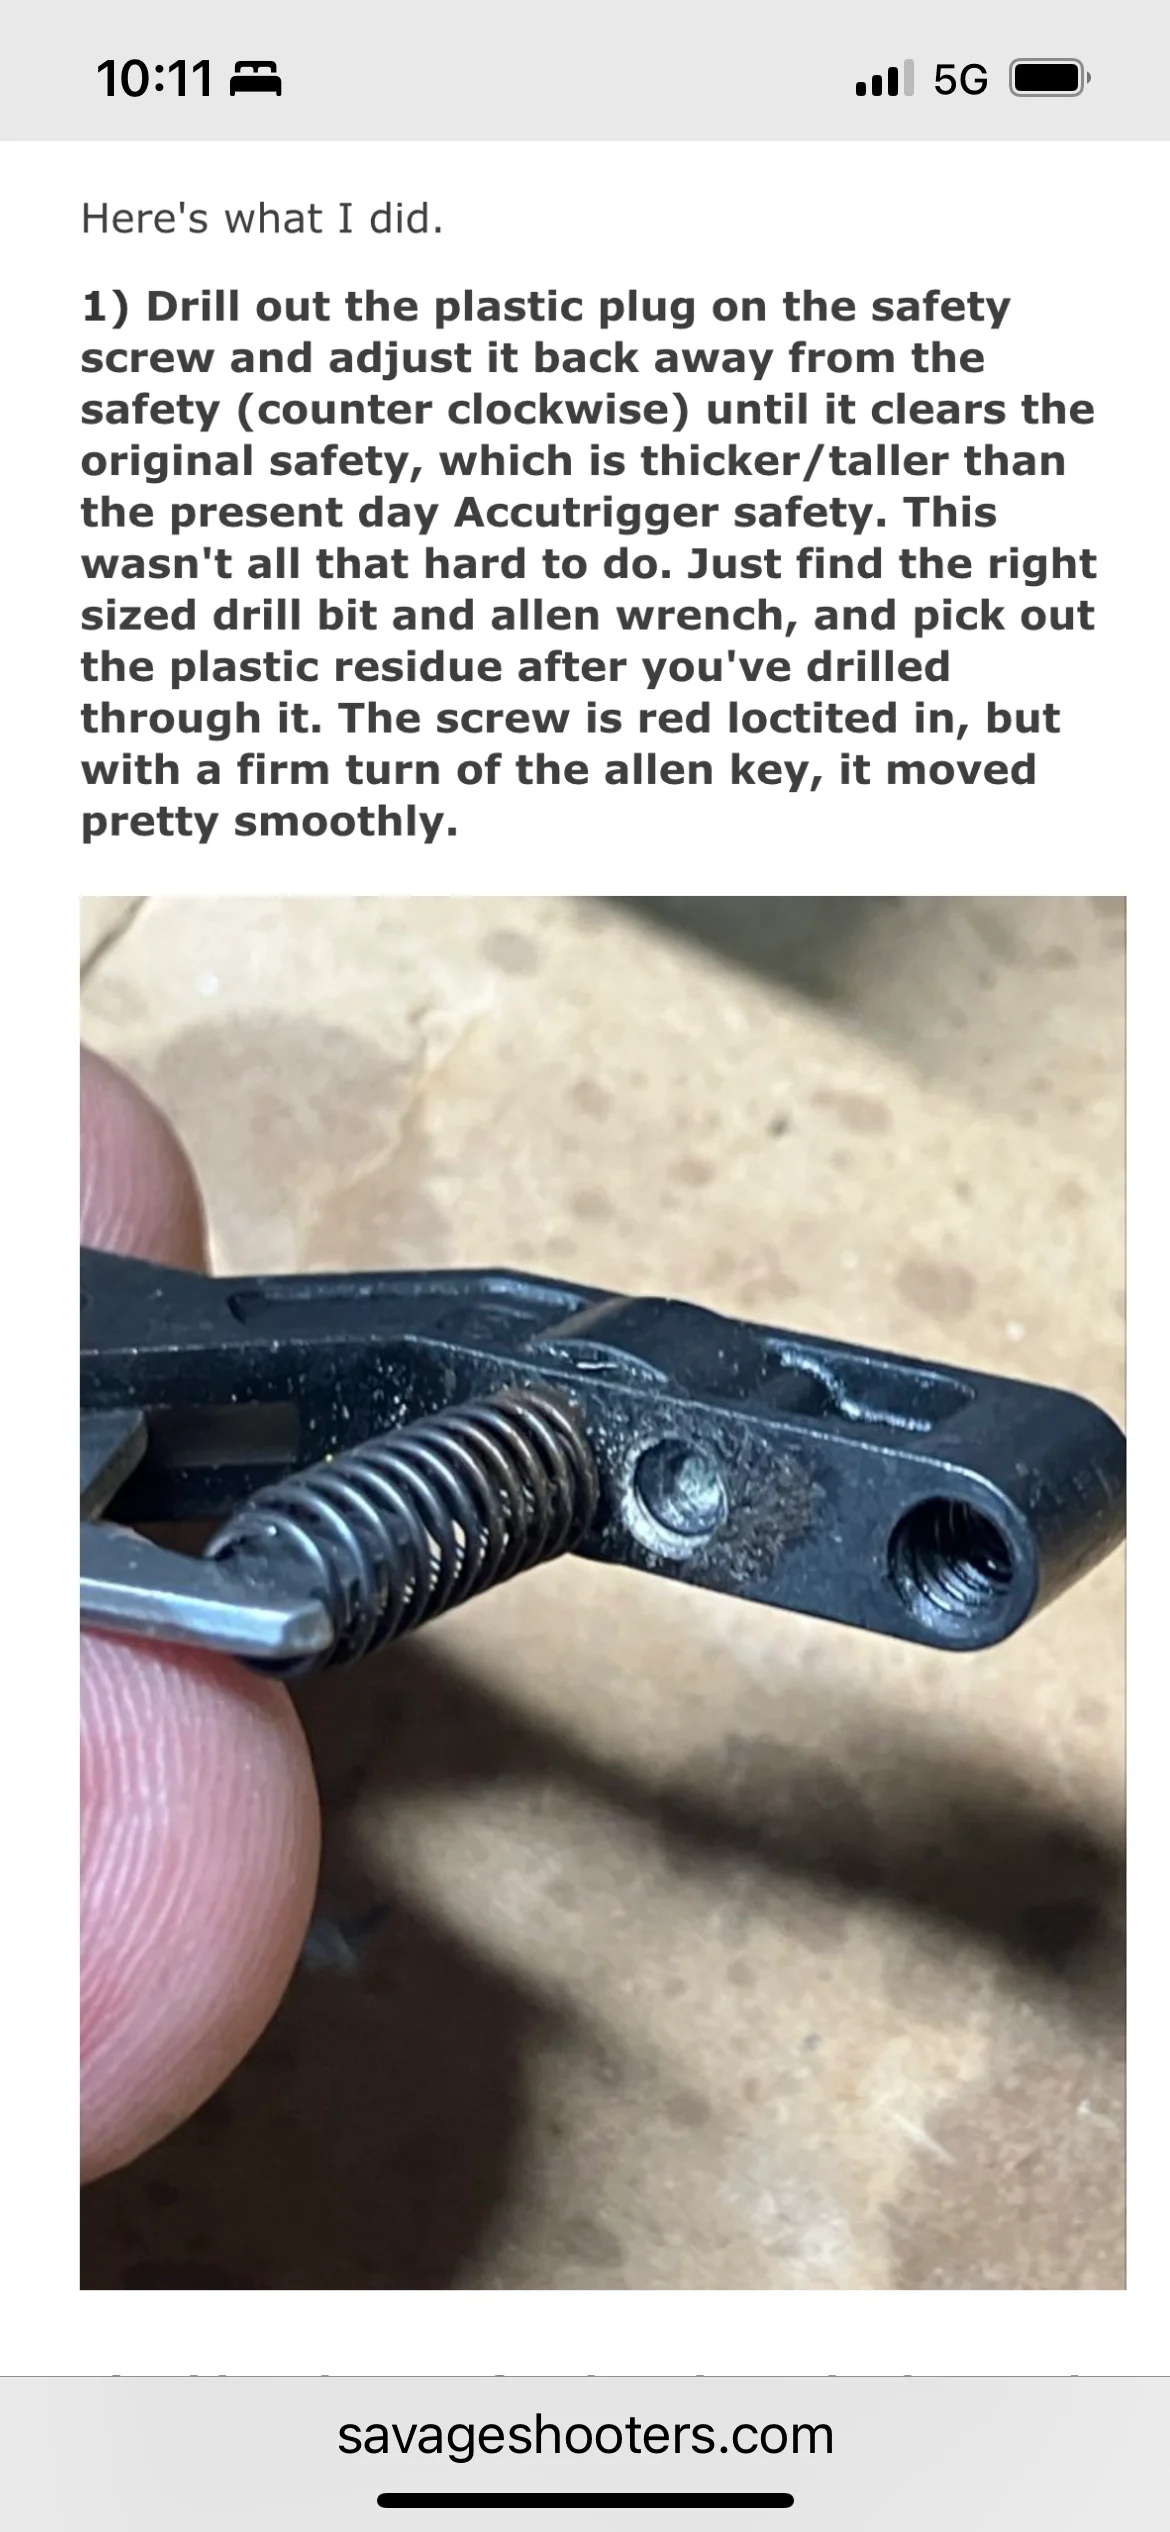
1. Drill out the plastic plug on the safety screw and adjust it back away from the safety (counter clockwise) until it clears the original safety, which is thicker/taller than the present day Accurtrigger safety. This wasn't all that hard to do. Just find the right sized drill bit and Allen wrench and pick out the plastic residue after you've drilled through it. The screw is red locktighted in, but with a firm turn of the allen key, it moved pretty smoothly.
2. Widen the gap for the trigger in the steel trigger guard. The Accutrigger has a wider body (to allow for the blade) than the original 3-screw trigger. A few passes with a carbide milling bit in my Dremel followed by a file worked pretty well for this.
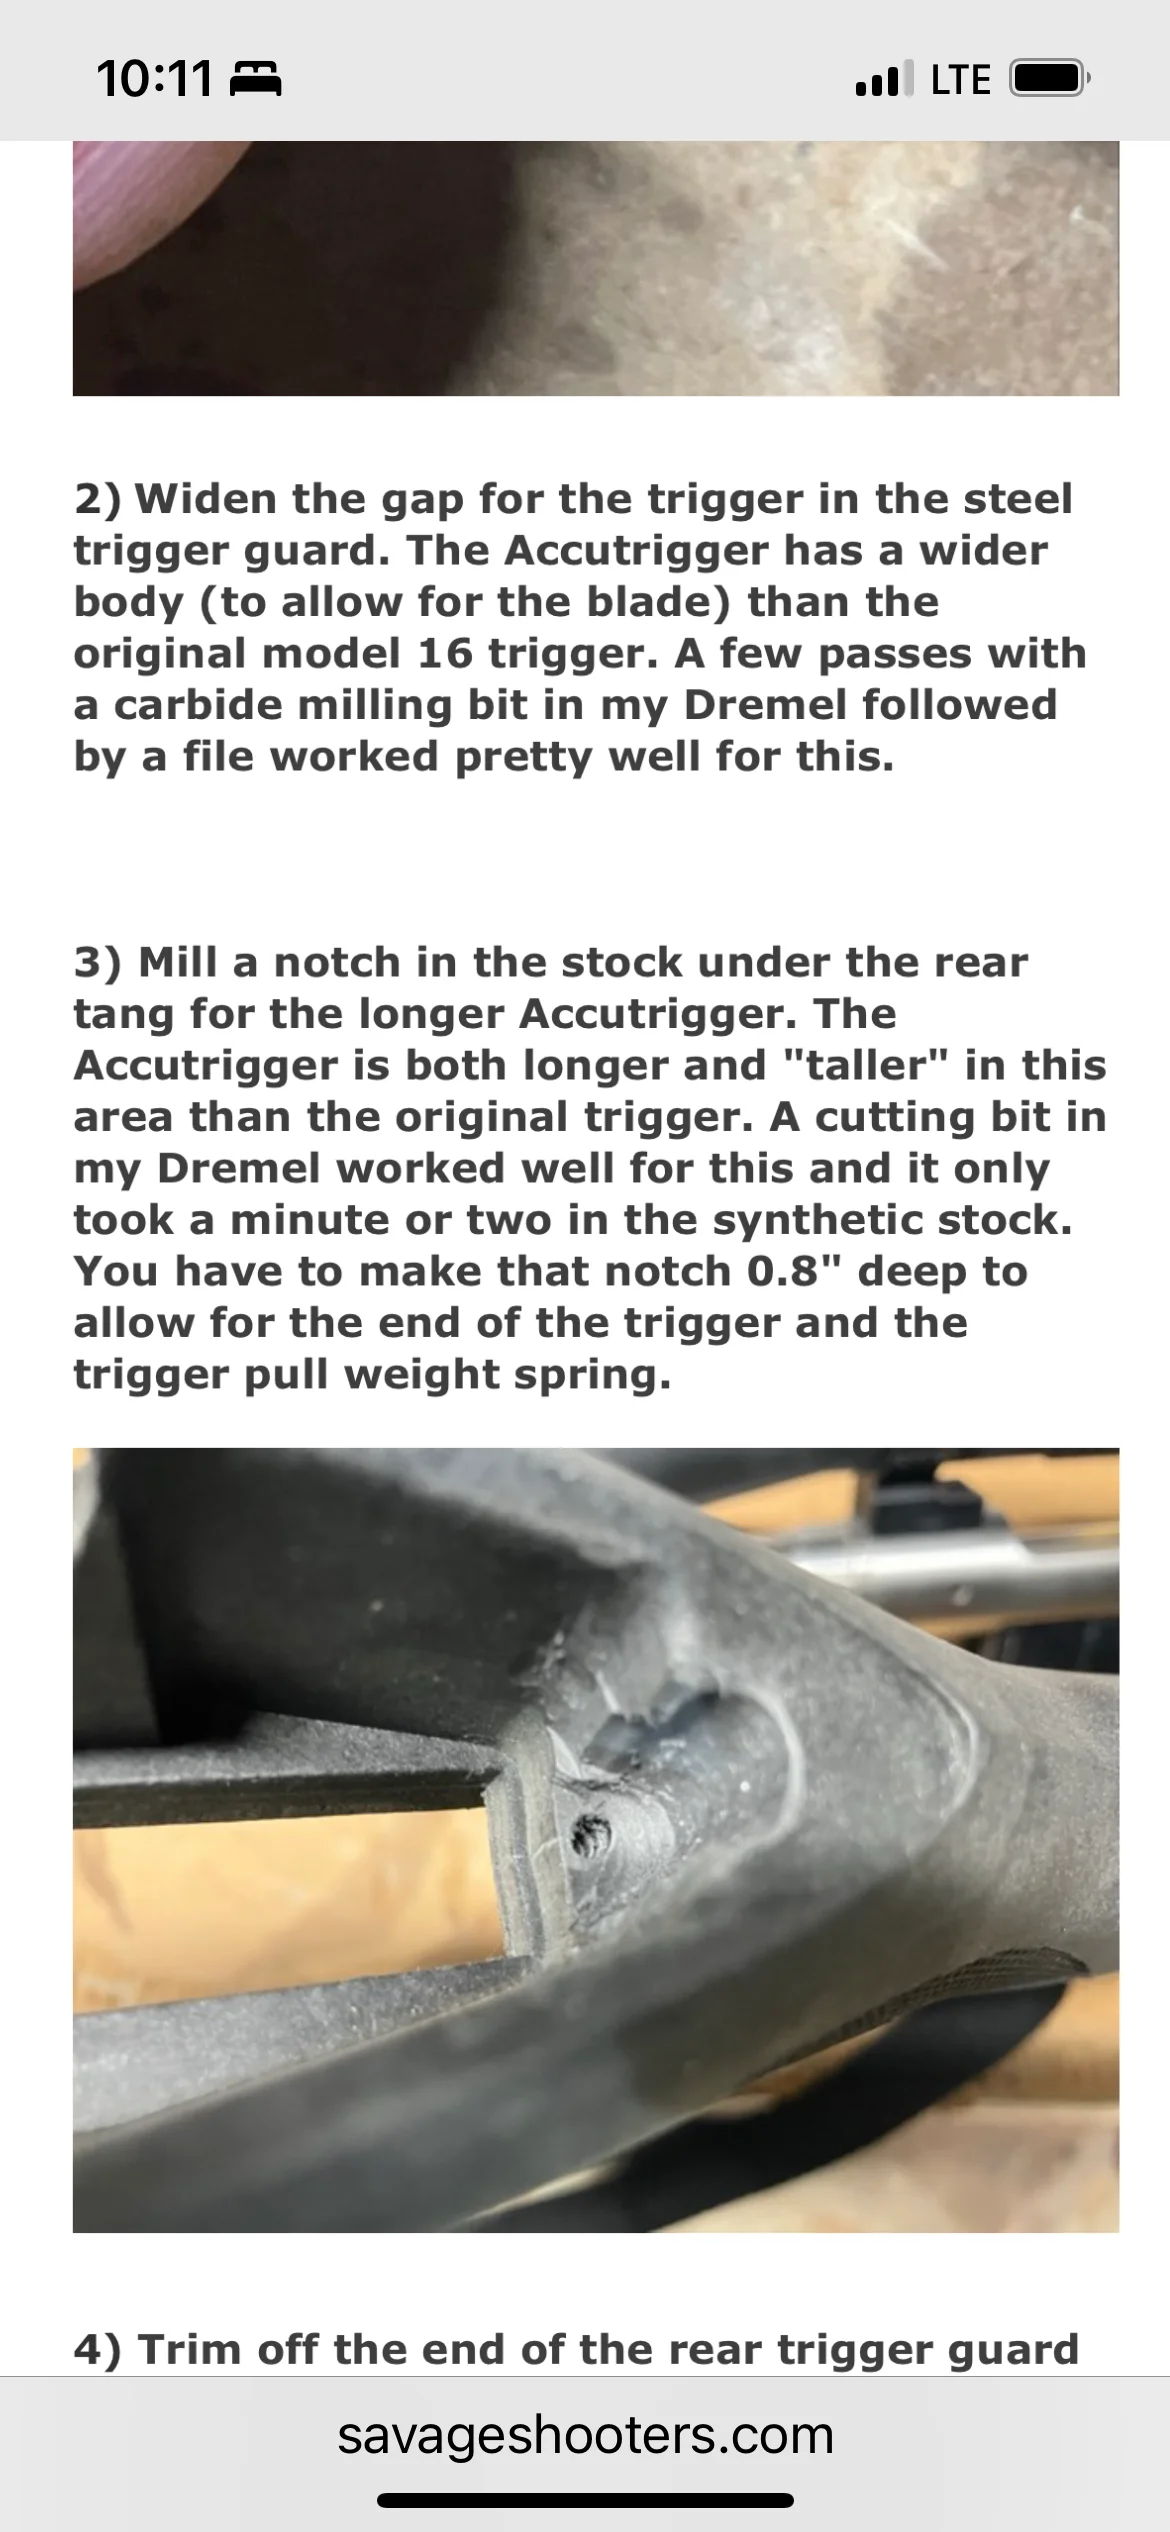
3. Mill a notch in the stock under the rear tang for the longer Accutrigger, the Accutrigger is both longer and "taller" in this area than the original trigger. A cutting bit in my Dremel worked well for this and it only took a minute or two in the synthetic stock. You have to make that notch .8" deep to allow for the end of the trigger and the trigger pull weight spring.
4. Trim off the end of the rear trigger guard screw. When you mill out the notch under the rear tang for the extra length and depth of the Accutrigger, the rear trigger guard screw may protrude through into that notch and interfere with the trigger. I used a cutting wheel in my Dremel to trim about 1/8" of that screw. There is still plenty of length and plenty of meat in the synthetic stock to capture that screw and hold things tight.
That's it. Start to finish took me about 45 minutes, but only because I haven't done it before and I wanted to be careful. The last thing I did was trim 2 coils off the pull weight spring at the back of the Accutrigger because it bottomed out at 3lbs. After testing it many times, I decided I wantedsome wiggle room on that adjustment, so I trimmed off two coils, bent the end 90º, and reinstalled it.
Now I can back the trigger down to about 2.25lbs, I set it at 2.5lbs to match the trigger in my Savage 308.
I will try to scan and post the pictures provided in the original write up, that depends how well the printed pictures re-scan.