An Experiment in Rimfire Bedding

Josh Smith

Member
Joined
Feb 6, 2026
Messages
14
For various reasons I don't want to glass bed my Savage MkII. I'm not sure I'll stick with this stock, and, in my work with Mosins, I find that minimal receiver to stock contact provides the best repeatability. I'm experimenting to see if that'll carry over to rimfire; I think it should.

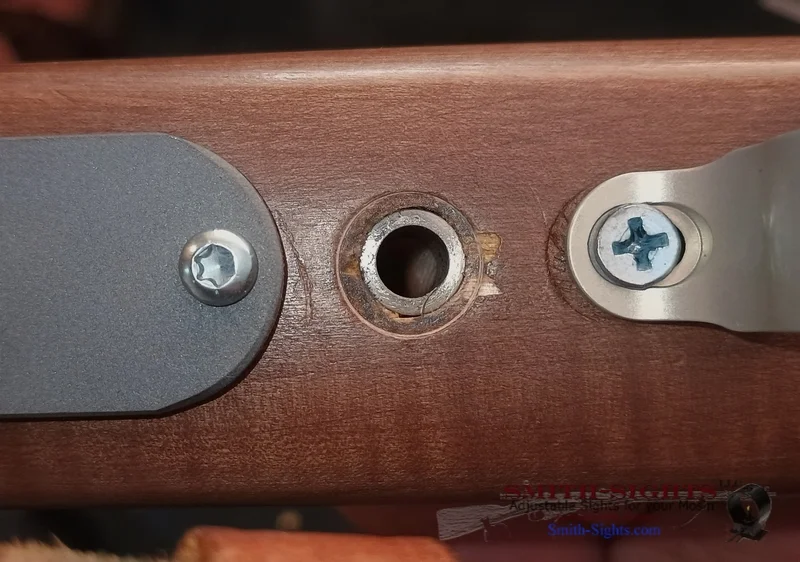
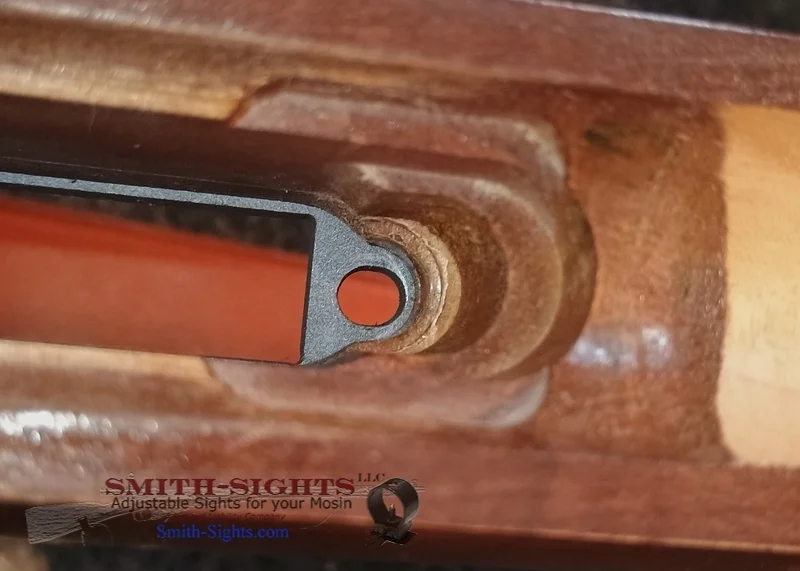
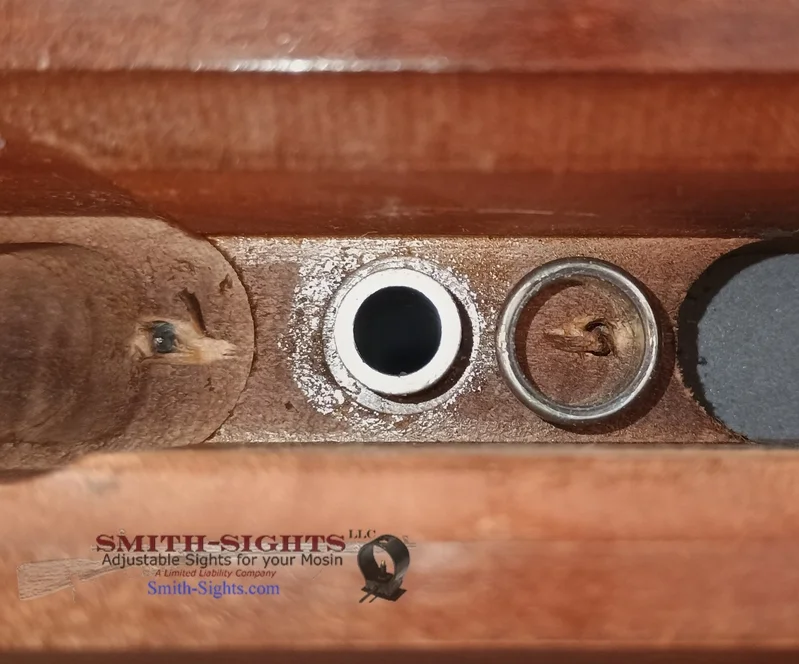
Self-locking pillars are, from what I can tell, my own invention. They should provide the rigidity of epoxy-secured pillars without the epoxy.
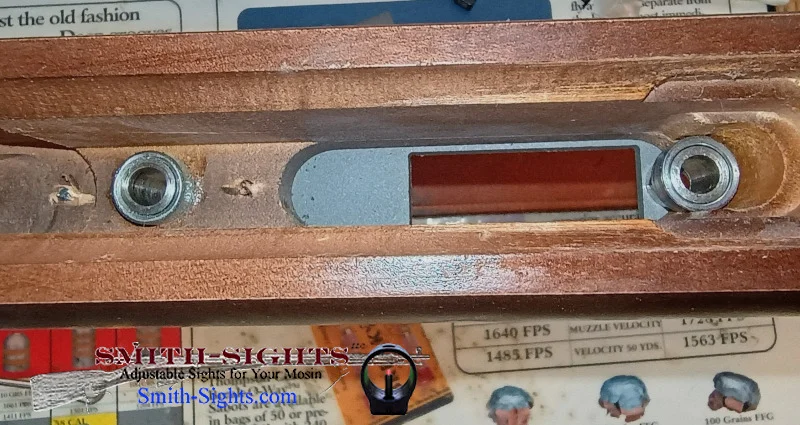
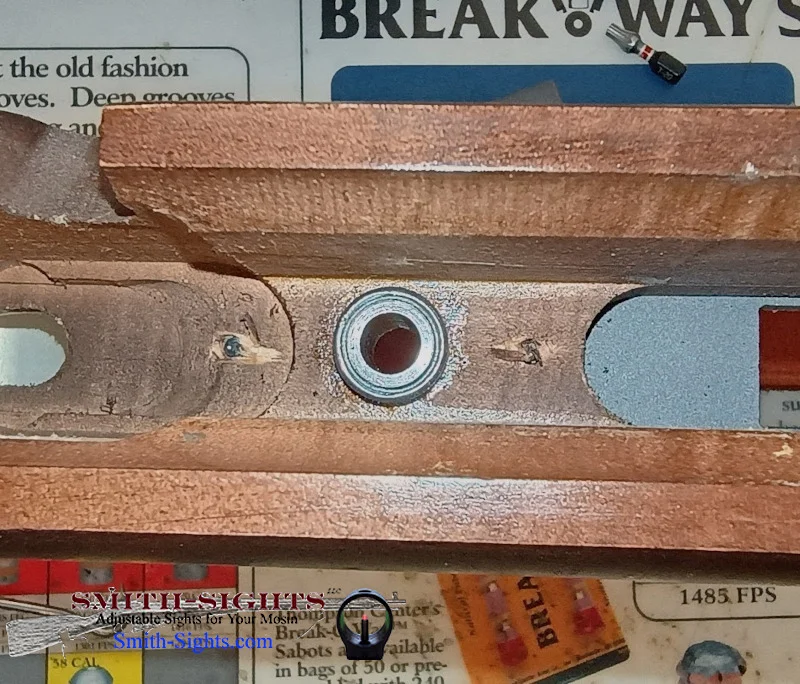
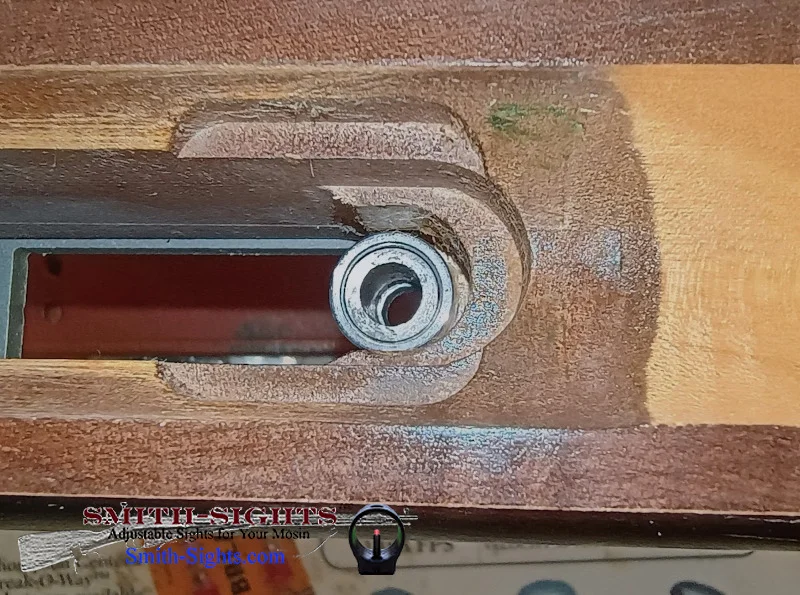
1 front and rear.webp
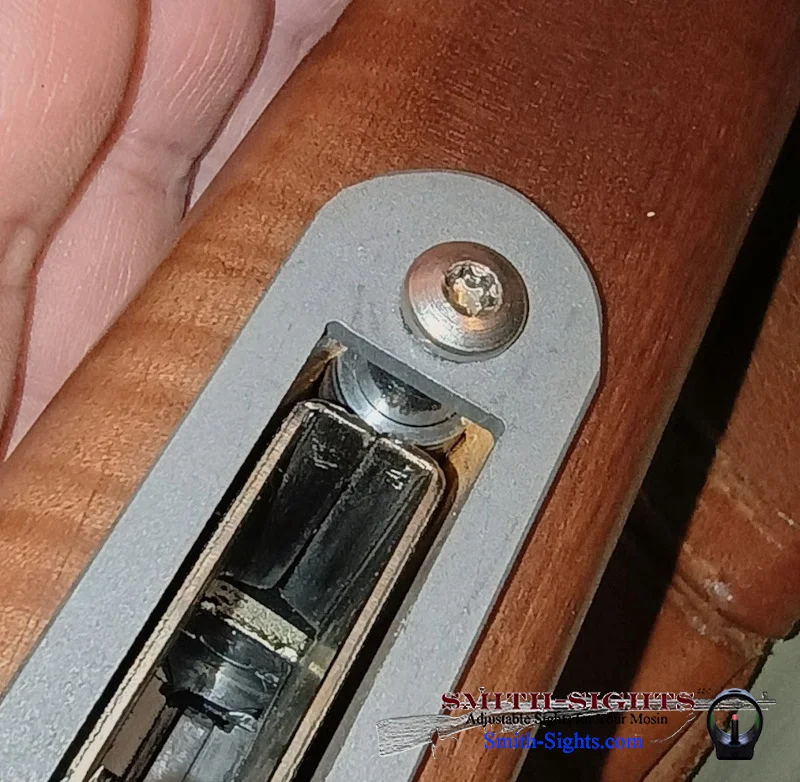
2 rear.webp
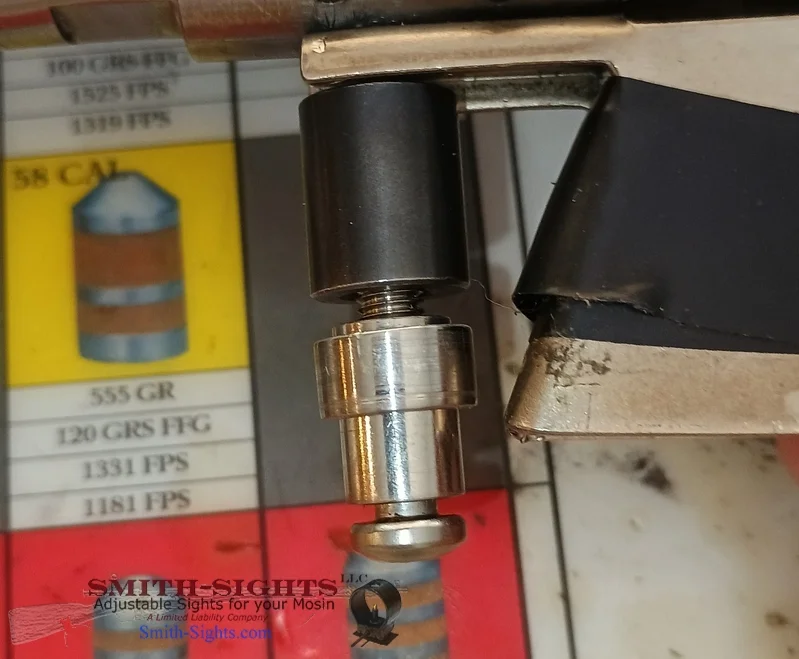
3 front.webp
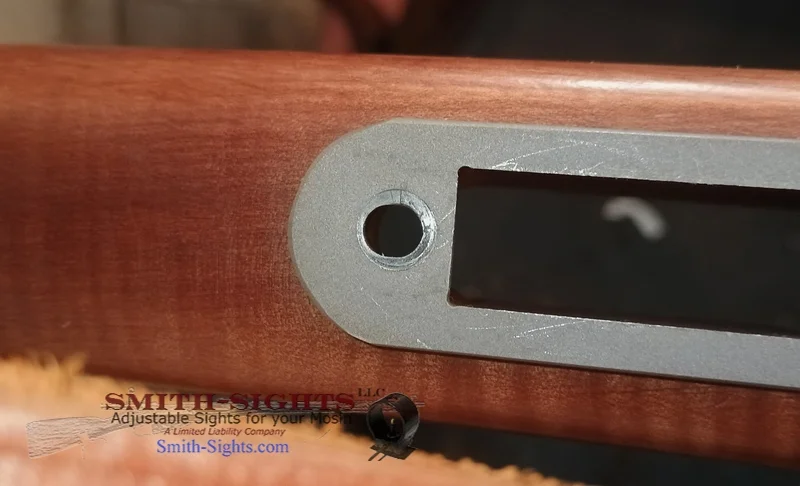
4 front, bottom.webp

They're made of two parts, allowing the pillars to clamp to the wood when the action screws are tightened. Length sizing is critical so as to clamp the wood without crushing it.

As critical as securing horizontal movement is securing vertical movement. On centerfire rifles, I do this by shimming the vertical surface of the recoil lug crossbolt to ensure firm contact with the recoil lug. The Savage MkII has no recoil lug, so I used the rearmost nut which happens to secure the trigger housing to the receiver:
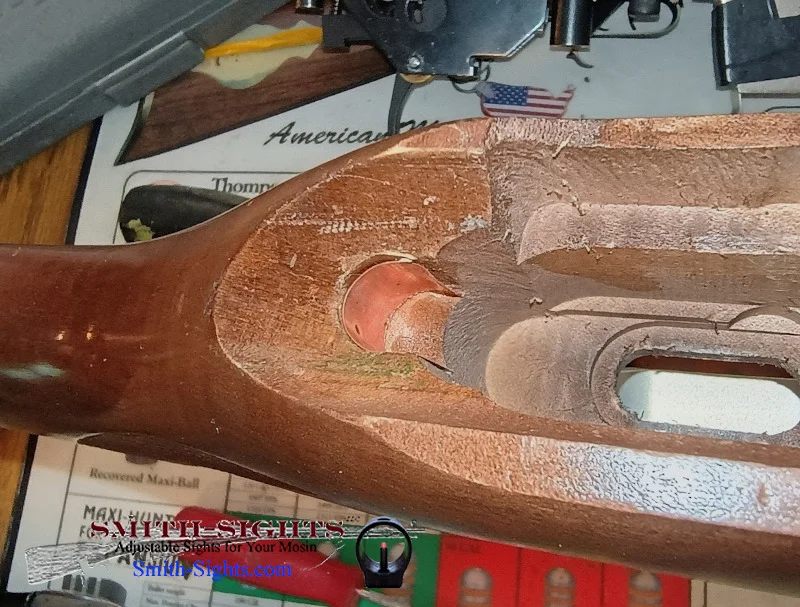

5 rear shim.webp

This little bit of shim stock provides a nice, tight fit.

This design has been an evolution, applying lessons I've learned from playing with Mosins and M.95s and modifying them a bit for this application. I think this is its final form, but maybe not. We'll see.

Regards,

Josh
 
Finding a hobby project within the larger scope of this pastime we all take part in, Firearms Enthusiasm, is a wonderful thing. I’m glad you found this as an enjoyable endeavor.

I’m a bit confused as your meaning of Self Locking Pillars? Without the Epoxy, the Pillar is floating. The problem with wood is Creep. Environment changes affect it quite a bit. This doesn’t happen with something like an Aluminium Chassis, as the whole inlet is really just one big PILLAR. But in a wood stock, the epoxy BONDS to the contact surfaces of both the Aluminum or Steel Pillar & the wood itself. So, the circumference of both the pillar & the hole bored in the stock. I’m not understanding how the pillar in your photos is prevented from movement?

Also, I’m really not trying to be discouraging. I hope you don’t think that. It’s just that stock bedding has been in practice for at least 120years. By both individuals & companies with money to invest in R&D. I’m of the opinion its secrets have been discovered long ago. And I believe the method of pillar bedding using a good 2-part epoxy, is the superior method. (Not including bedding blocks.) But I would like to see more of what you are doing. And more in depth demonstration of said procedure.
 
Finding a hobby project within the larger scope of this pastime we all take part in, Firearms Enthusiasm, is a wonderful thing. I’m glad you found this as an enjoyable endeavor.

I’m a bit confused as your meaning of Self Locking Pillars? Without the Epoxy, the Pillar is floating. The problem with wood is Creep. Environment changes affect it quite a bit. This doesn’t happen with something like an Aluminium Chassis, as the whole inlet is really just one big PILLAR. But in a wood stock, the epoxy BONDS to the contact surfaces of both the Aluminum or Steel Pillar & the wood itself. So, the circumference of both the pillar & the hole bored in the stock. I’m not understanding how the pillar in your photos is prevented from movement?

Also, I’m really not trying to be discouraging. I hope you don’t think that. It’s just that stock bedding has been in practice for at least 120years. By both individuals & companies with money to invest in R&D. I’m of the opinion its secrets have been discovered long ago. And I believe the method of pillar bedding using a good 2-part epoxy, is the superior method. (Not including bedding blocks.) But I would like to see more of what you are doing. And more in depth demonstration of said procedure.
Like I said, it's an experiment.

Photo_1778870994344.webp

This is what it looks like without the wood.

Photo_1778870994159.webp

DIP bottom metal for the front

1000011312.webp

Washer for the rear

1000011315.webp

Indent from front locking sleeve

1000011310.webp

Indent from rear locking sleeve (shown)


It may not work. Then again, it might.
 
Ok, I see what you’re doing. Great pictures. Thank you for sharing more. Well, in temperate environments, definitely indoors, could work very well.

In any case I hope it at least works out well on your rifle & shooting. And most importantly, I hope you are enjoying yourself doing it! I’m at the point now, where building & working on my firearms is every bit as enjoyable as shooting them. In fact, I may actually enjoy building/working on them MORE!

Kudos! For taking part in DIY action.👍
 
I like your idea and have tried it. It worked ok, but as good as a full bedded receiver in a wooden stock. Many years ago I shot rimfire benchrest. Both of my rifles were $4000 + which included a complete bedding of the action. Both were wood stocks. I tried it first with no pillars, then added pillars. You could easily see the difference in the grouping. A bench rest shooter wants they best group they can get and will spend money to do so. I had both stocks bedded and it was a work of art. Bedding the receiver so it's completely true and does not move in the stock was perfect. The groups got to where I wanted them to be. Then it was working out which ammunition it would shoot best with.

If your going to do just general target work, hunting, etc., what your doing will work out well.

Keep us posted.
 
I like your idea and have tried it. It worked ok, but as good as a full bedded receiver in a wooden stock. Many years ago I shot rimfire benchrest. Both of my rifles were $4000 + which included a complete bedding of the action. Both were wood stocks. I tried it first with no pillars, then added pillars. You could easily see the difference in the grouping. A bench rest shooter wants they best group they can get and will spend money to do so. I had both stocks bedded and it was a work of art. Bedding the receiver so it's completely true and does not move in the stock was perfect. The groups got to where I wanted them to be. Then it was working out which ammunition it would shoot best with.

If your going to do just general target work, hunting, etc., what your doing will work out well.

Keep us posted.

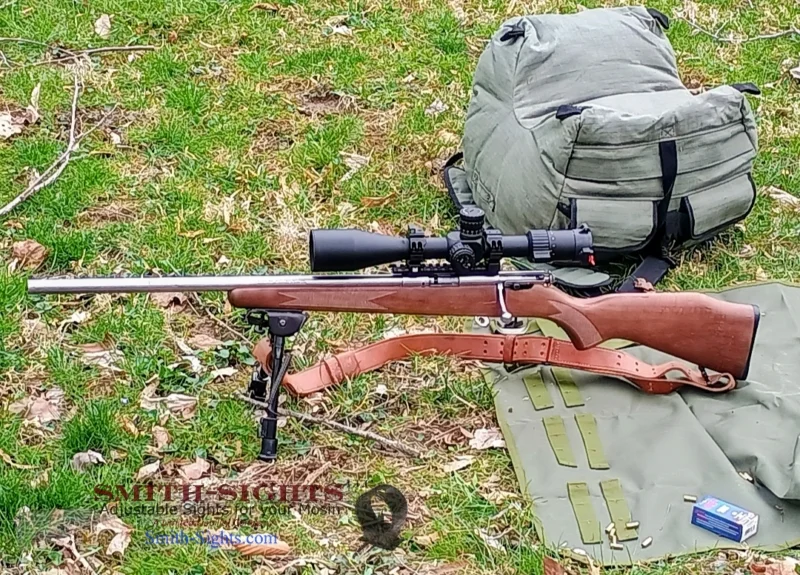
It's a glorified hunting rifle.

Photo_1774824615847.webp


Shooting groups is fun, but the main goal is to get the smallest groups possible with ammo like CCI Subsonic and SV. When I hunt, I enjoy taking head shots to 50 yards and body shots to 100, as long as the rifle and ammo combo is up to it.
 
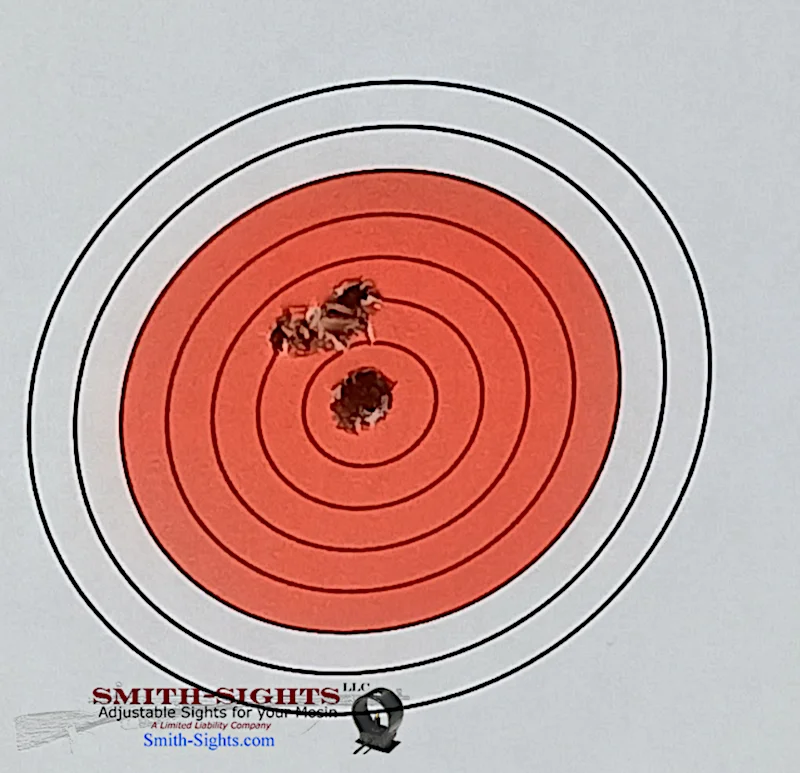
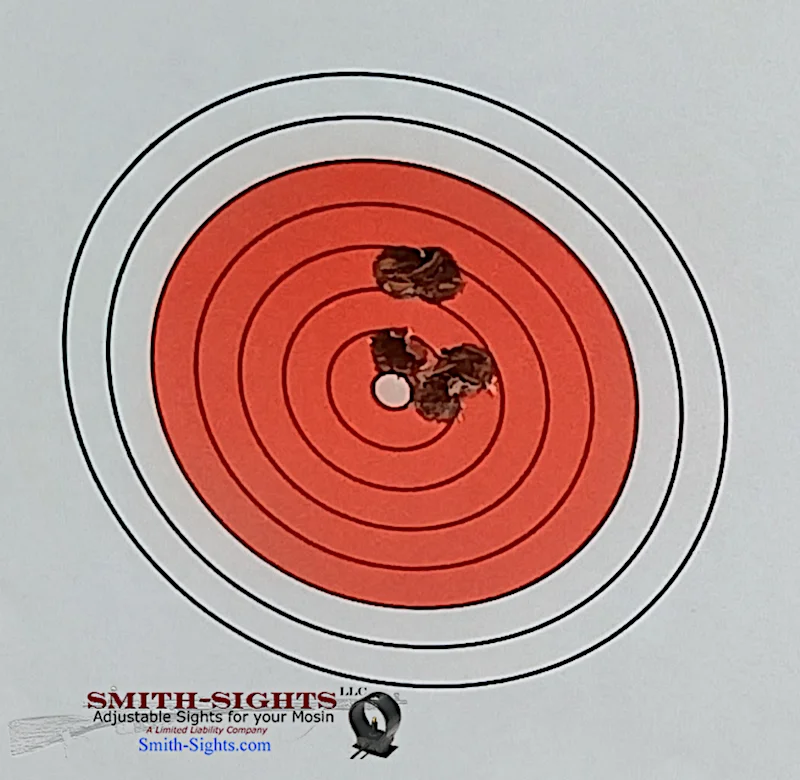
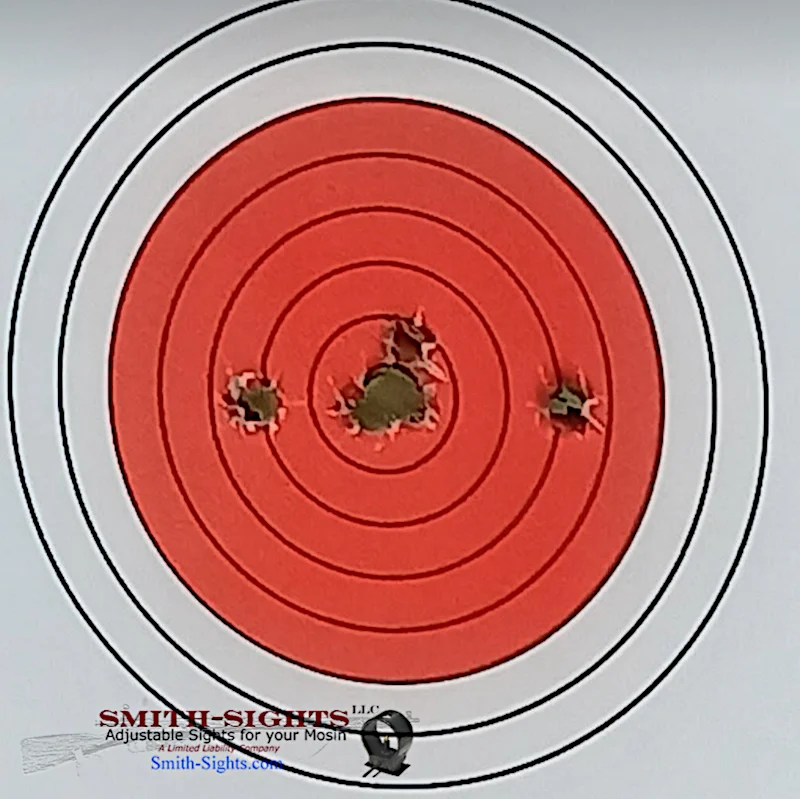
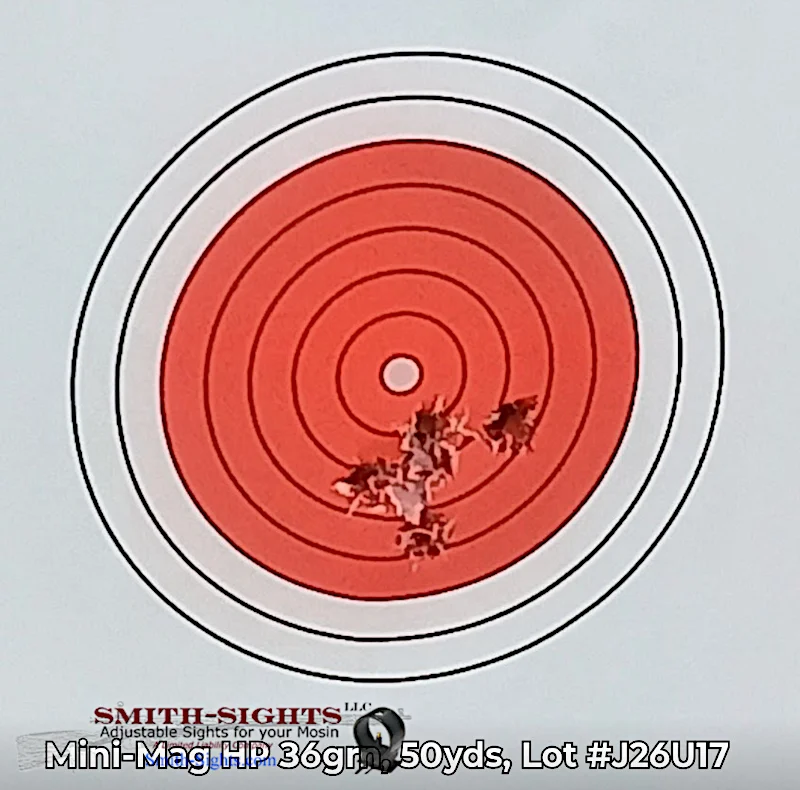
I don't have match ammo. In a range test yesterday, CCI Mini-Mags gave the best overall results. They could have been better; I'm still getting back in practice.

These were shot 50 yards, prone, with an old Harris bipod and a squeeze sock made from filling a sock with corncob animal bedding:

CCI Mini-Mag 40grn solids Lot J19U13 -1.webp
CCI Mini-Mag 40grn solids Lot J19U13 -2.webp

CCI Mini-Mag 40grn solids, Lot #J19U13 (Sept 2013)

CCI Mini-Mag HP 36grn Lot J19U13 -1.webp
CCI Mini-Mag HP 36grn Lot J19U13 -2.webp
CCI Mini-Mag HP 36grn Lot J19U13 -3.webp

CCI Mini-Mag HP 36grn, Lot #J19U13 (also September 2013)
 

Latest posts

Back
Top