

In all the years, many rounds fired and time afield in the worst weather conditions I've never had any operational malfunctions with my Impulse Predator rifles.
In all that time I've also never thoroughly cleaned the bolts because I wasn't sure how to disassemble them and never had time to really look into doing it.
I've just been flushing them out with WD40 and lubing them with Slip 2000.
While sitting around recovering from knee surgery I decided to delve into finding out how to disassemble the Impulse bolt.
The bolt is very heavy and I also wanted to see if I could flute it to shave some weight.
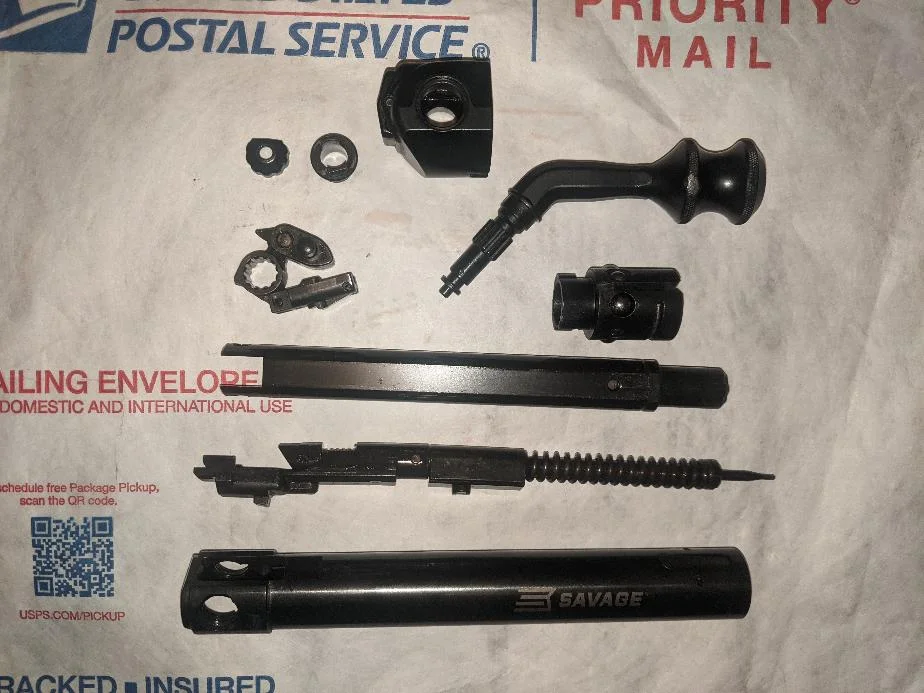
I found that the firing pin is a sub assy in a collar that's shrouded by an outer sleeve that's not thick enough to flute.
I don't want to weaken it's structural integrity in any way, so fluting is out of the question.
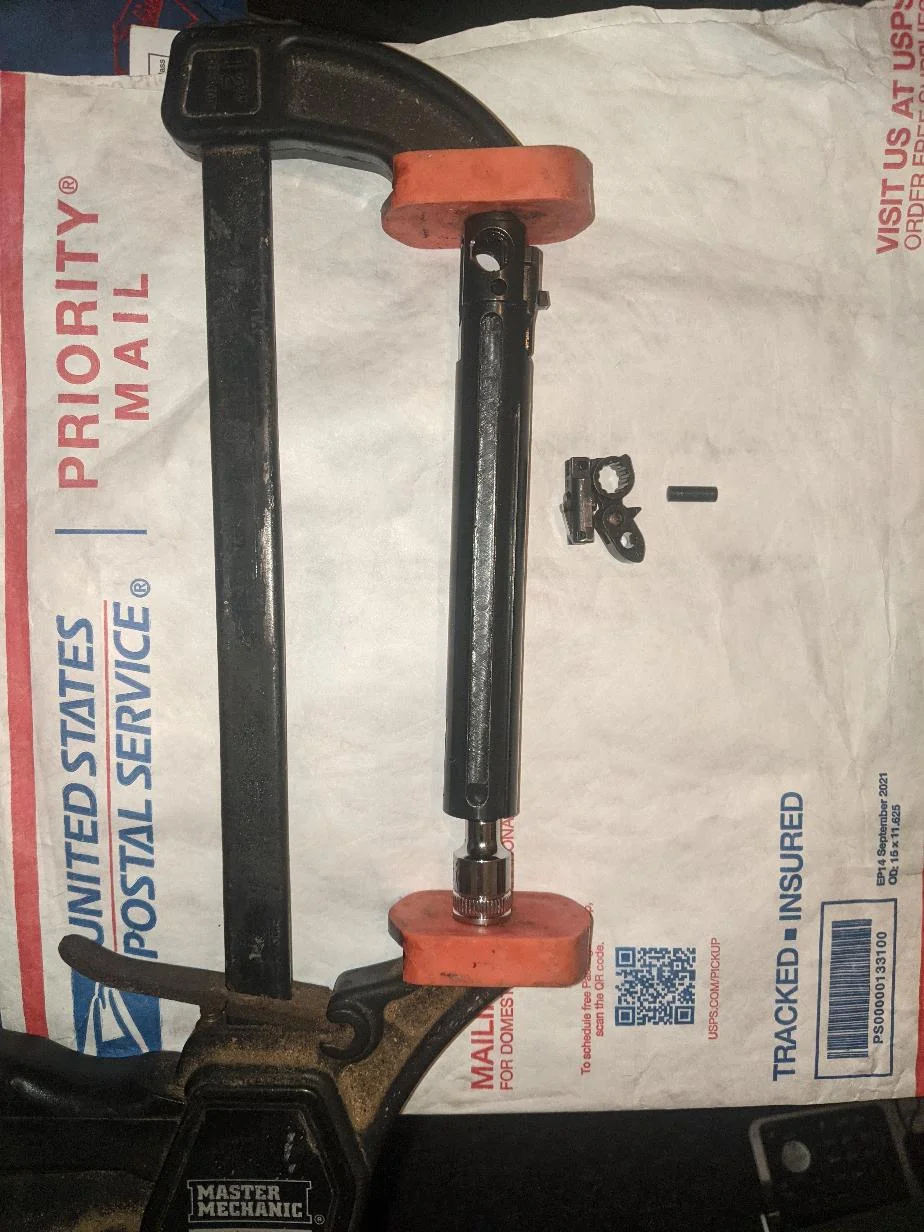
After inspection I found that there's a cross pin thats recessed inside the rear of the bolt assy, but you need to compress the bolt to get access to it.
The bolt is under a lot of tension and unless you're super human there's no way to compress it and remove the cross pin by hand.
There's two holes located under the bolt release shroud that gives you access to remove the pin once you compress the bolt and line the pin up with those holes.
A solid built 12" quick action clamp made easy work compressing it.
After removing the bolt head I used a 5mm 3/8 socket to encompass the firing pin extension to protect it.
I marked the parts with a sharpie and took pics so it went back together the way it came out.
It was dirty inside even though the bolt looked clean on the outside.
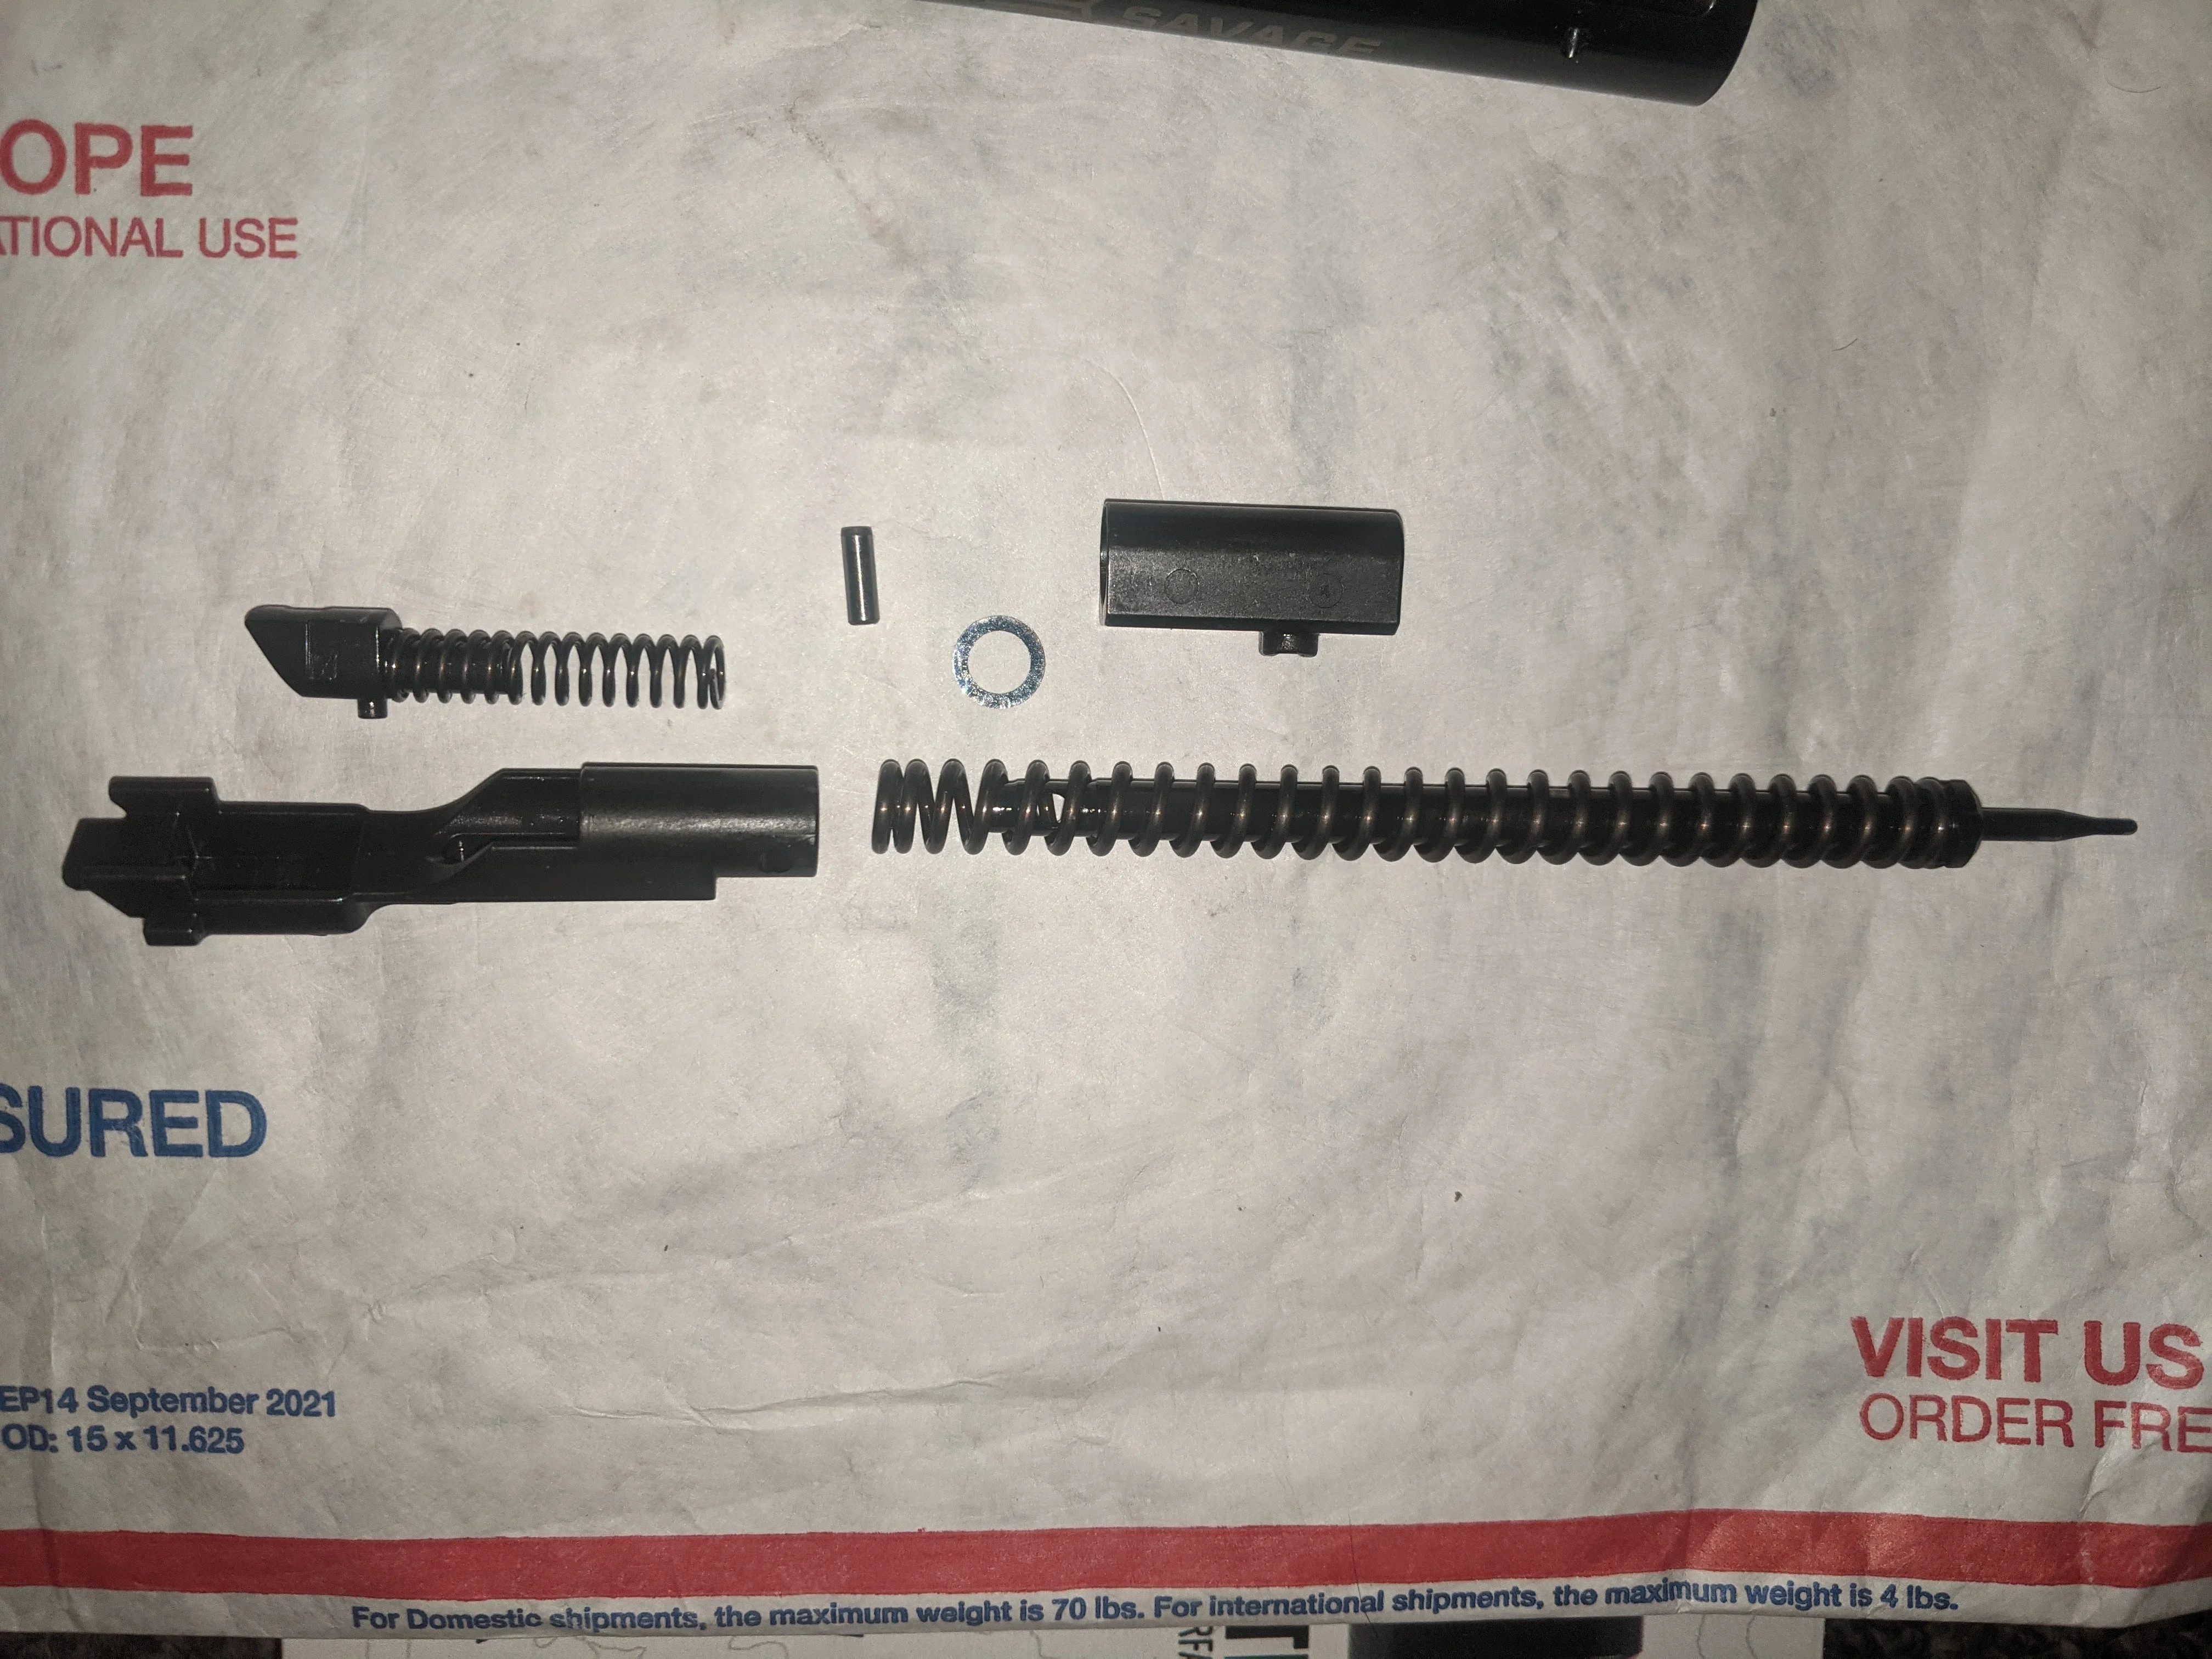
One thing I can tell you is that although the firing pin assy can be disassembled easily, it's a pain in the ass to reassemble.
There's a small washer located between two shrounds and it was a bitch lining up all the pieces while aligning the firing pin during compression.
After you get that done, then you have to line up the cross pin holes.
I needed three hands, but eventually got it done with two with two hands and some vulgar language aimed at the Savage Impulse designers.
I only disassembled the FP assy because I needed to find out what makes it tick and I would advise not to do it unless you need some drama in your life.
The firing pin spring controls the bolt handle tension that keeps the bearings locked into the extension.
I would like to reduce the bolt tension so the bolts easier to manipulate, but still have enough force to have reliable primer ignition.
If I get ambitious I might lop a few coils off the spring to accomplish that, but I'm going to see if Savage will sell me the spring so I can have one to replace it.
I do know that the bolt does cycle easier after cleaning and lubing it properly.
The Journey continues........
SJC
In all that time I've also never thoroughly cleaned the bolts because I wasn't sure how to disassemble them and never had time to really look into doing it.
I've just been flushing them out with WD40 and lubing them with Slip 2000.
While sitting around recovering from knee surgery I decided to delve into finding out how to disassemble the Impulse bolt.
The bolt is very heavy and I also wanted to see if I could flute it to shave some weight.
I found that the firing pin is a sub assy in a collar that's shrouded by an outer sleeve that's not thick enough to flute.
I don't want to weaken it's structural integrity in any way, so fluting is out of the question.
After inspection I found that there's a cross pin thats recessed inside the rear of the bolt assy, but you need to compress the bolt to get access to it.
The bolt is under a lot of tension and unless you're super human there's no way to compress it and remove the cross pin by hand.
There's two holes located under the bolt release shroud that gives you access to remove the pin once you compress the bolt and line the pin up with those holes.
A solid built 12" quick action clamp made easy work compressing it.
After removing the bolt head I used a 5mm 3/8 socket to encompass the firing pin extension to protect it.
I marked the parts with a sharpie and took pics so it went back together the way it came out.
It was dirty inside even though the bolt looked clean on the outside.
One thing I can tell you is that although the firing pin assy can be disassembled easily, it's a pain in the ass to reassemble.
There's a small washer located between two shrounds and it was a bitch lining up all the pieces while aligning the firing pin during compression.
After you get that done, then you have to line up the cross pin holes.
I needed three hands, but eventually got it done with two with two hands and some vulgar language aimed at the Savage Impulse designers.
I only disassembled the FP assy because I needed to find out what makes it tick and I would advise not to do it unless you need some drama in your life.
The firing pin spring controls the bolt handle tension that keeps the bearings locked into the extension.
I would like to reduce the bolt tension so the bolts easier to manipulate, but still have enough force to have reliable primer ignition.
If I get ambitious I might lop a few coils off the spring to accomplish that, but I'm going to see if Savage will sell me the spring so I can have one to replace it.
I do know that the bolt does cycle easier after cleaning and lubing it properly.
The Journey continues........
SJC


